今日はTips的にopenFrameworksで火を表現する方法をご紹介します。
火を作るときにポイントになるのは「揺らめき」と「輝き」です。大体、ゆらゆらしてる光ってるものを作ったら炎って言われたらそう見えてきます。
素材作り
今回はAdobe Illustrator CS6を使っていますが、大抵のお絵描きソフトなら同じようにできると思います。
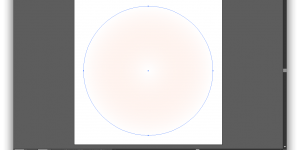
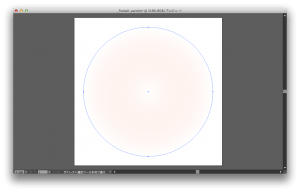
円を描いて、塗りを円形グラデーションにします。色はなんでもいいのですが、炎っぽい赤にしたければ、薄いサーモンピンク系の色がいいと思います。コツは少し赤めかなー?くらいにすることです。あと、青も少しだけ混ぜておくと、それっぽい表現にできます。
私は#ffffffの不透明度30%から#ff6622の不透明度0%へのグラデーションにしました。openFrameworksのプロジェクトのbin/data/フォルダにparticle.pngで保存しましょう。
パーティクルを作る
揺らめきの表現をするためにパーティクルシステムを作ります。
[code lang=cpp]
#include "ofMain.h"
class Particle{
private:
static ofImage img; // パーティクルの画像を読み込む
ofPoint p; // 位置
ofPoint v; // 速度
ofPoint c; // 炎自体の中心位置
float size; // 炎の大きさ
int lt=40; //消えるまでの時間
public:
Particle(){};
Particle(ofPoint _p, float _size);
static void setup();
void update();
void draw();
bool isDead();
};
class FireBall {
vector<Particle> ps; // パーティクルの配列
ofPoint pos; // 炎の位置
float size; // 炎の大きさ
public:
FireBall(){};
FireBall(float x, float y);
void setup();
void update();
void draw();
};
[/code]
[code lang=text]
#include "FireBall.h"
ofImage Particle::img;
Particle::Particle(ofPoint _p, float _size){
size = _size;
p = _p;
v = ofPoint(ofRandom(-1, 1), ofRandom(-1,1));
v = 0.3*size*ofRandom(1)*v.normalize(); //初期速度0.3
c = _p;
}
void Particle::setup(){
img.loadImage("particle.png");
}
void Particle::update(){
p += v;
ofPoint d = p-c;
v.x += 0.02*(ofRandom(-1, 1)-0.05*d.x)*size; // だんだんと真ん中に寄るように
v.y += -0.02*size; // 上に昇るように
–lt; // 残り生存時間を減らす
};
void Particle::draw(){
img.draw(p,5*size, 5*size);
};
bool Particle::isDead(){
return (lt <= 0);
}
FireBall::FireBall(float x, float y){
pos = ofPoint(x,y);
size = 1; // ここで大きさを指定してやる
}
void FireBall::update(){
// パーティクルを追加
for(int i=0; i<10; ++i)
ps.push_back(Particle(pos, size));
for (vector<Particle>::iterator it=ps.begin(); it != ps.end(); ++it) {
it->update();
}
for (vector<Particle>::iterator it=ps.begin(); it != ps.end(); ++it) {
if(it->isDead()){
ps.erase(it);
–it;
}
}
};
void FireBall::draw(){
for (vector<Particle>::iterator it=ps.begin(); it != ps.end(); ++it) {
it->draw();
}
};
[/code]
実際にパーティクルを動かす
とりあえず、普通に作ってみます。
[code lang=cpp]
#pragma once
#include "ofMain.h"
#include "FireBall.h"
class testApp : public ofBaseApp{
public:
void setup();
void update();
void draw();
void exit();
void keyPressed (int key);
void keyReleased(int key);
void mouseMoved(int x, int y );
void mouseDragged(int x, int y, int button);
void mousePressed(int x, int y, int button);
void mouseReleased(int x, int y, int button);
void windowResized(int w, int h);
void dragEvent(ofDragInfo dragInfo);
void gotMessage(ofMessage msg);
vector<FireBall> fs;
};
[/code]
[code lang=cpp]
#include "testApp.h"
//————————————————————–
void testApp::setup(){
ofSetFrameRate(100);
fs.push_back(FireBall(ofGetWidth()/2, ofGetHeight()/2));
ofBackground(0);
ofEnableAlphaBlending();
ofSetRectMode(OF_RECTMODE_CENTER);
Particle::setup();
}
//————————————————————–
void testApp::update(){
for (vector<FireBall>::iterator it=fs.begin(); it!=fs.end(); ++it) {
it->update();
}
}
//————————————————————–
void testApp::draw(){
for (vector<FireBall>::iterator it=fs.begin(); it!=fs.end(); ++it) {
it->draw();
}
}
//以下略
[/code]
実行してみると次の画像のようになります。
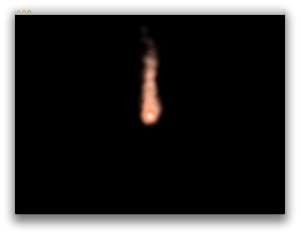
これでも、まぁ、炎に見えないことはないのですが、どちらかと言うと火の割には暗くて、輝いている感じがでません。
輝かせる
輝かせる方法は意外と簡単です。
testApp.cpp内のsetup()内に次の一文を追記します。
[code lang=cpp]
ofEnableBlendMode(OF_BLENDMODE_ADD);
[/code]
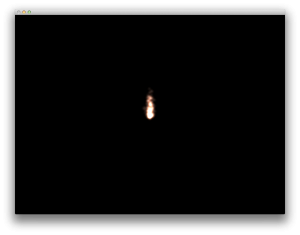
このofEnableBlendModeは合成の方法を指定するもので、OF_BLENDMODE_ADDを指定すると、加算合成になります。光の色は重なったとき加算合成されるので、これを指定すると、オブジェクト自体が光って見えるのです。
まとめ
炎を作る方法は簡単に言って二点。
-「パーティクルシステム」を使って適度なランダム性を持った揺らめきを表現する。
– 合成方法を加算合成に指定
あとは、色や、定数などを調整すると、それっぽい炎が作れます。ぜひ、お試しあれ。
コメントを残す